


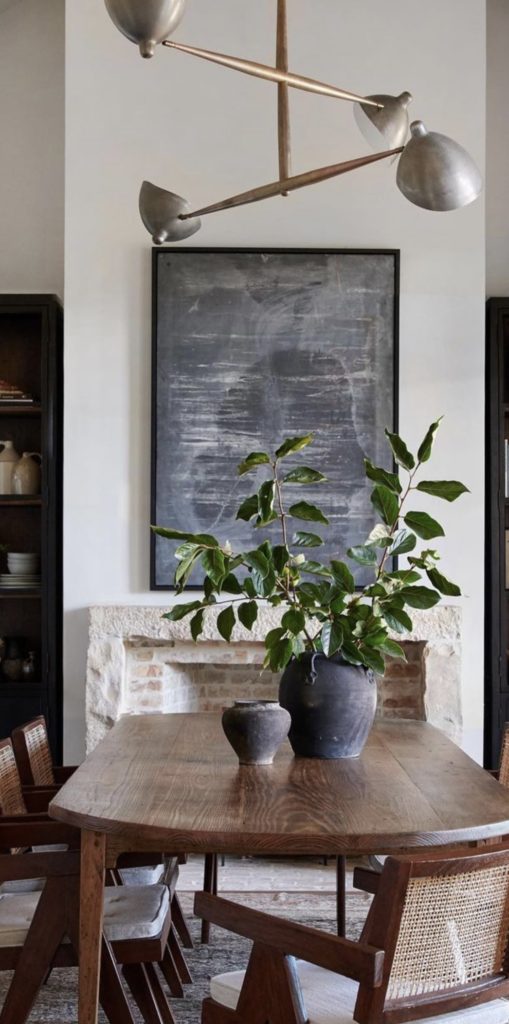
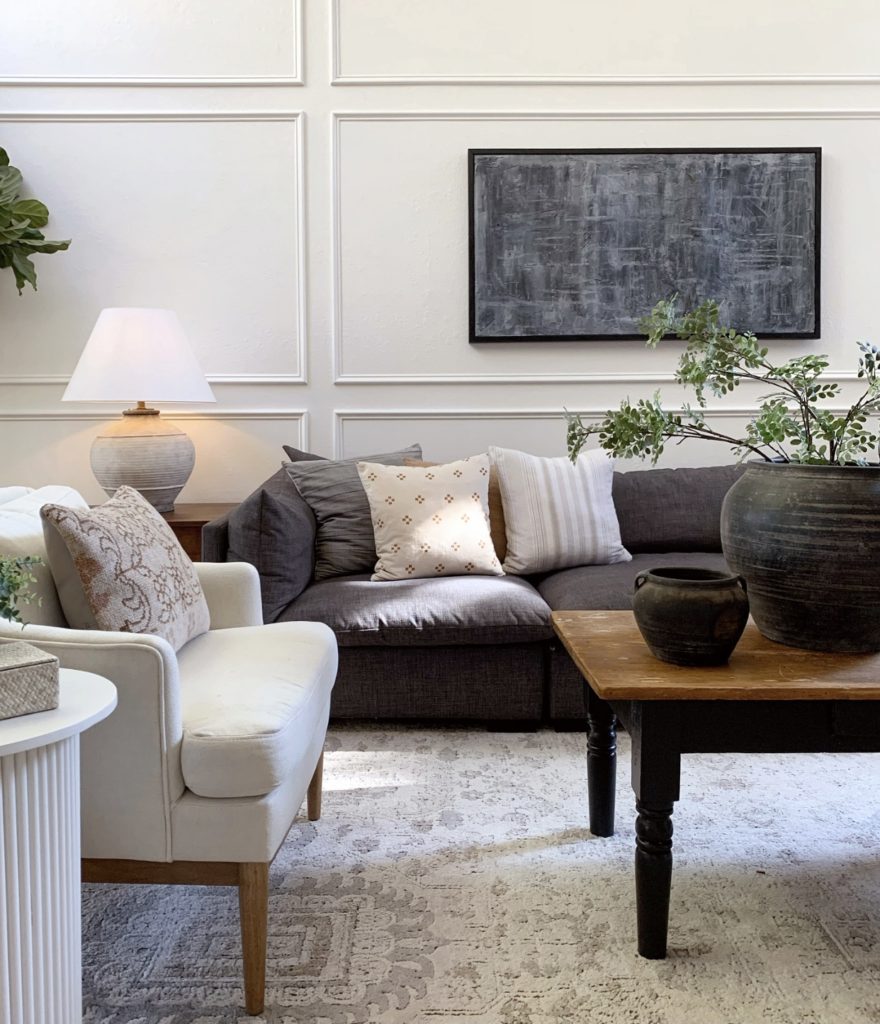
I fell pretty hard for a piece of artwork I saw in a space designed by the designer, Amber Interiors (seen below). While I don’t know the cost of the original piece, I do know this designer works on high-end projects and has some celebrity clientele. Being that I wanted to spend under $100 on our artwork- I think it’s a fair assumption that the original was not in budget.
We personally had all of the tools needed, as well as paint, drywall mud, etc. on hand already. We only had to buy the lumber and drop cloth canvas. Therefore we spent just about $50 bucks. We realize not everyone has these supplies on hand, which would make the price go up but we still believe it could be accomplished for $100.
If you do not have the tools, or the know how to use said tools, that’s okay! For you we suggest buying a pre-made canvas. Or even a preexisting large canvas art-piece from Home Goods, Goodwill, etc. and use the same artistic process (part2) on that pre-made canvas. It may cost a little extra to buy pre-made but still budget friendly!
Note: I will break this DIY into 3 parts. One: the canvas build. Two: the artistic process. Three: the frame build. If you’re not interested in building a canvas and plan to use a store bought option, scroll to part 2.
PART 1– BUILD YOUR CANVAS
Tools Needed:
- Saw
- Drill
- Screw attachment for drill
- Staple gun
- Speed square
Supplies Needed:
- Three- 2x2x8 pine lumber boards
- Painters canvas (drop cloth)
- Wood glue
- Staples
Step 1: Determine the size you want your finished art piece to be. We made the canvas 52×27.5 inch canvas. With frame the total measurement on the wall is:
Step 2: Cut your 2x2x8 horizontal lengths using saw. We cut two 52 inch lengths
Step 3: Cut your 2x2x8 vertical lengths using saw. We cut four 24.5 inch lengths
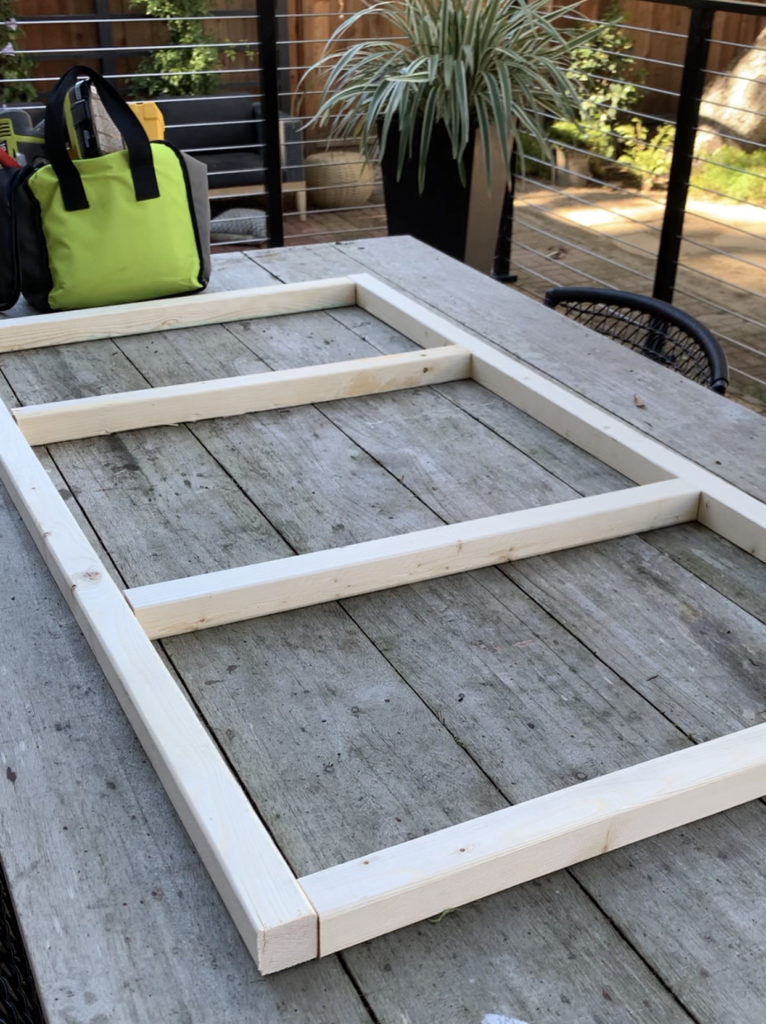
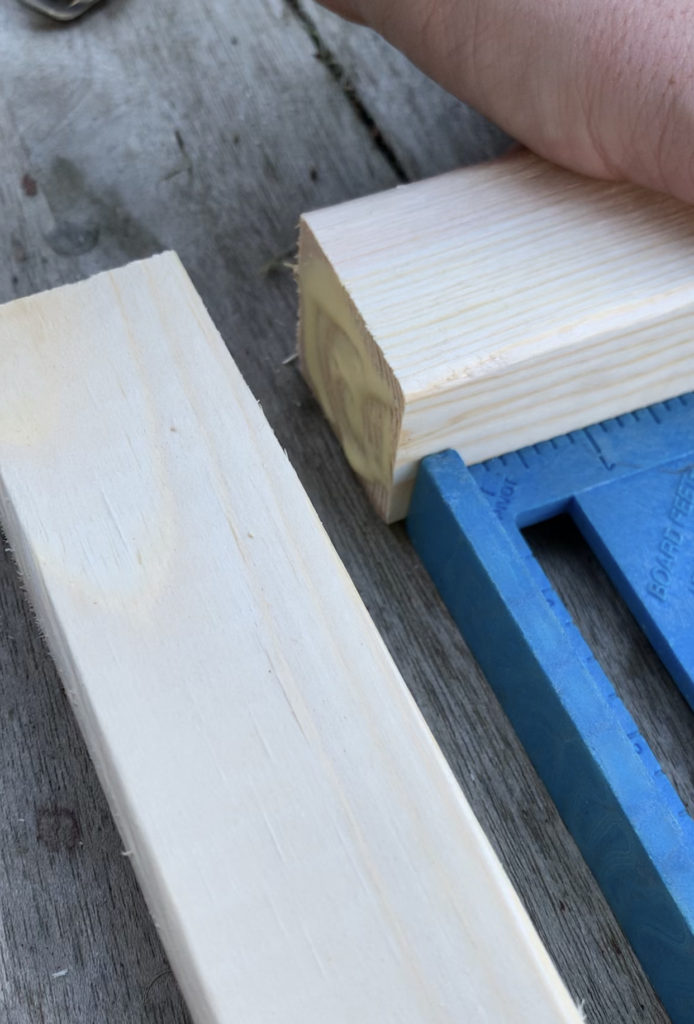
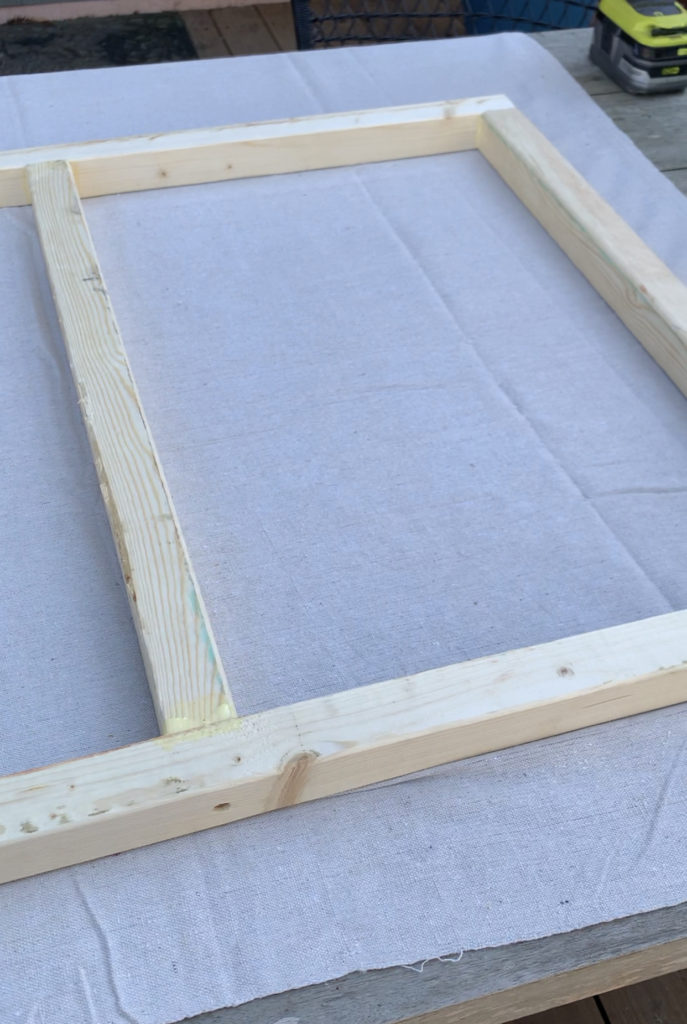
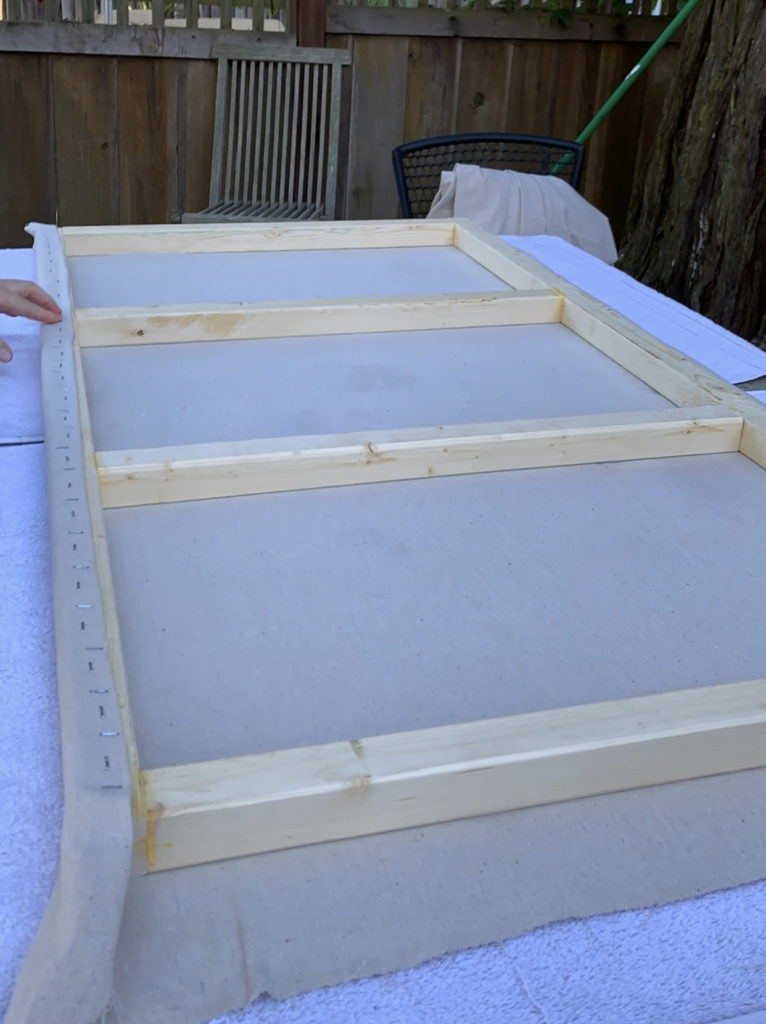
Step 4: Set these 6 pieces of cut lumber on table top. The vertical pieces will be sandwiched by the horizontal pieces. Two of the vertical pieces represent the sides of canvas, the other two are interior supports. The two horizontal pieces represent the top and bottom of canvas. See image for clarification.
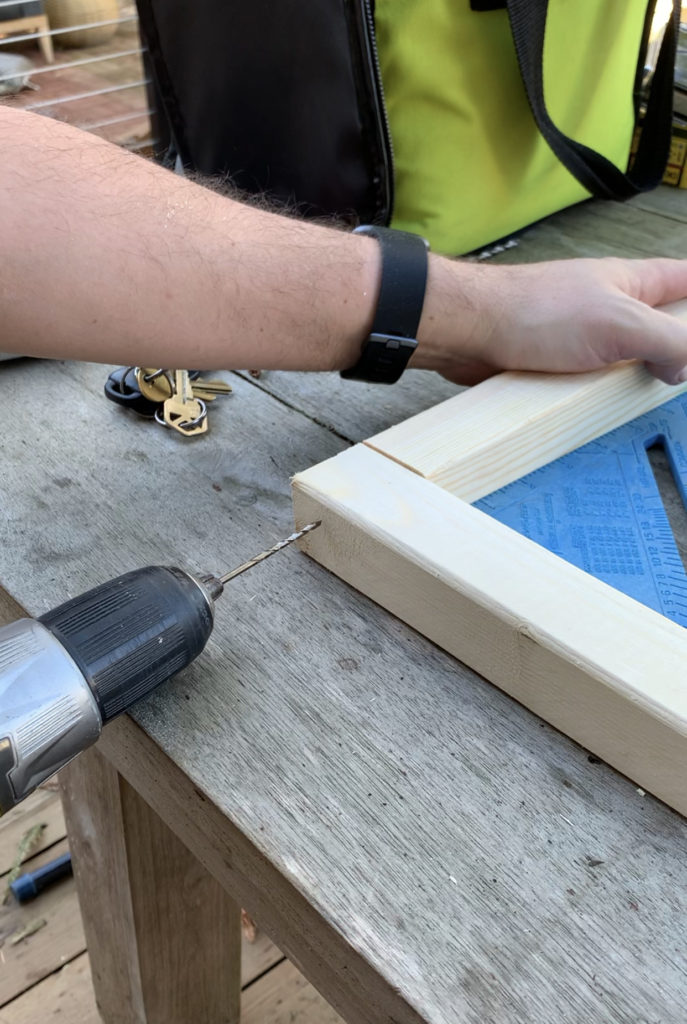
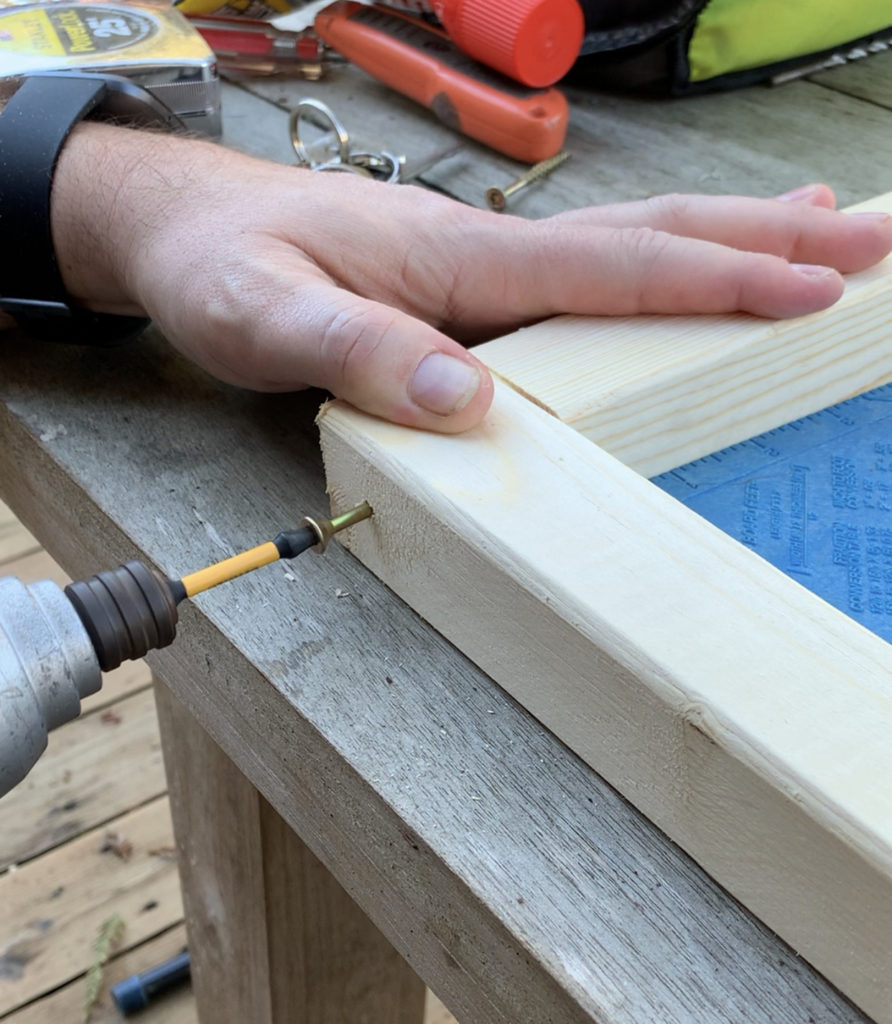
Step 5: Drill small pilot holes where the vertical and horizontal boards meet. This pre-drilling will ensure that the boards don’t split when you add screws.
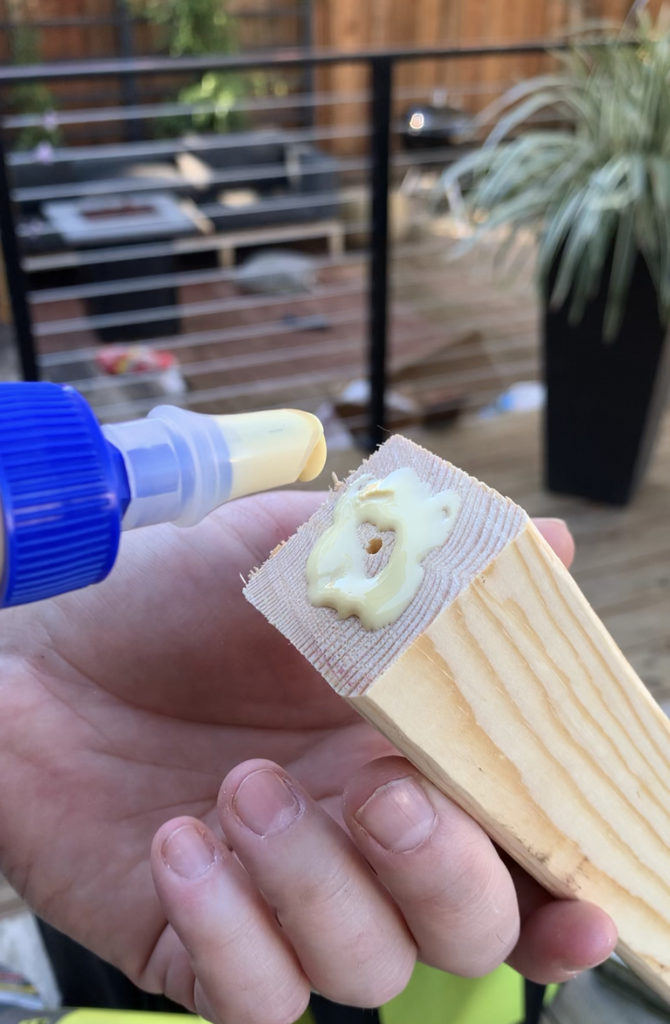
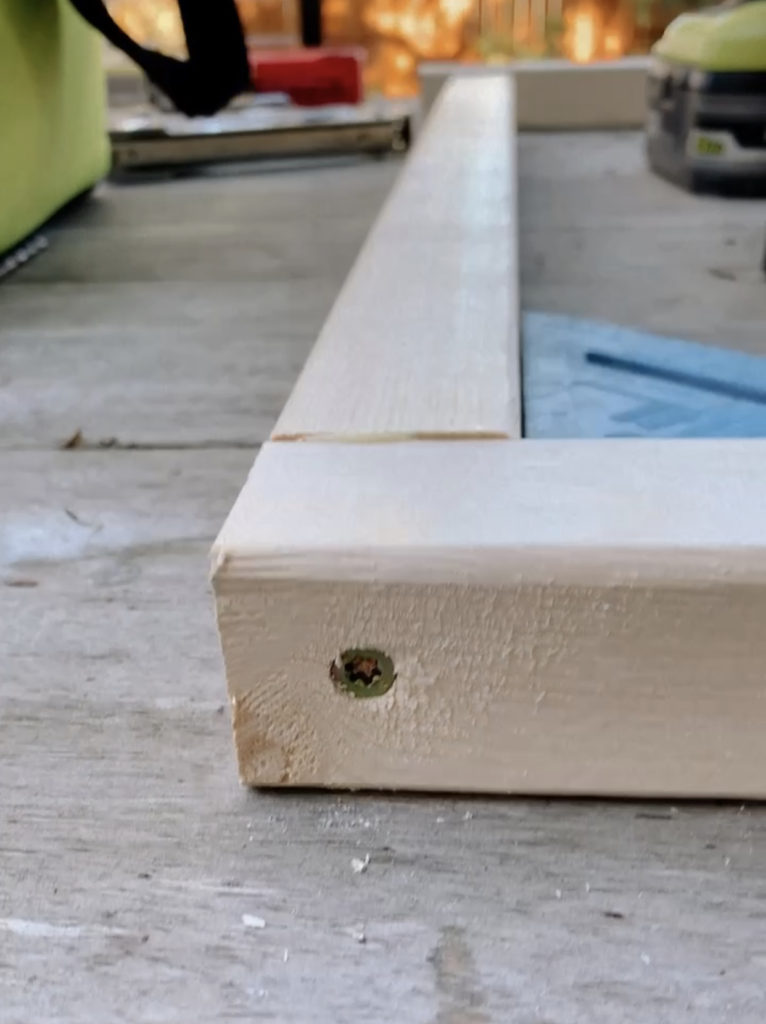
Step 6: Add wood glue to the vertical boards before you attach them to horizontal boards with your screws. (pre-drill, glue, screw) NOTE: use your speed square to ensure the corner are square.
Repeat these steps to glue/screw it all together.
*SEE GALLERY BELOW FOR VISUAL OF STEPS 4-6*
Step 7: Set frame aside for a moment.
Step 8: Lay your drop cloth out on table. Set canvas frame on top of the drop cloth.
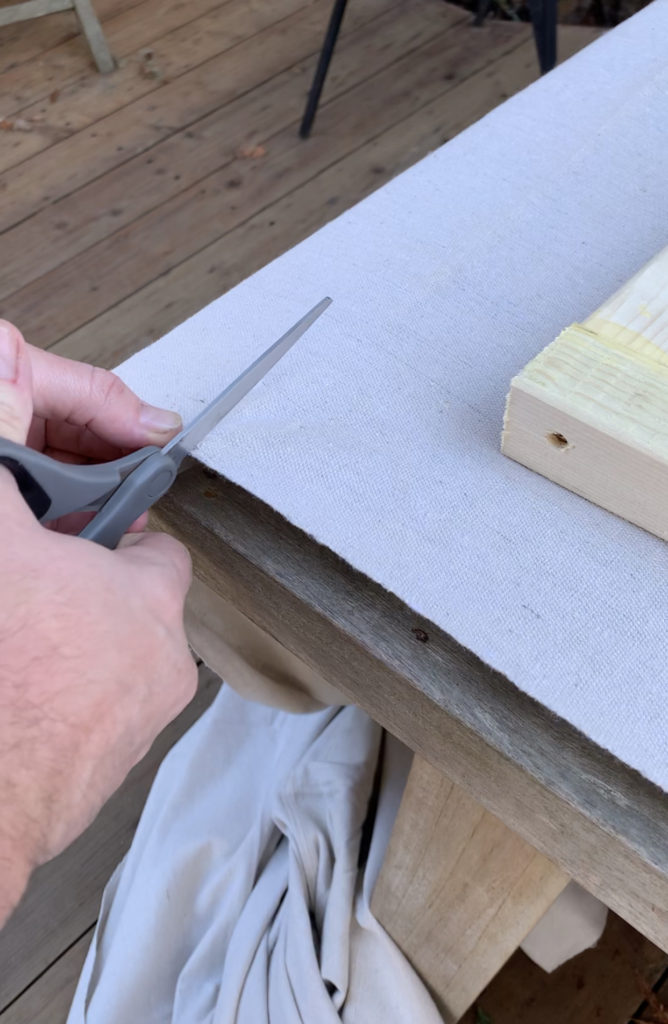
Step 9: Cut drop cloth down to size. Leaving about 5 inches of fabric around all edges of the canvas. Iron drop cloth if necessary *we did*
Step 10: Wrap the drop cloth around wood frame and attach with your staple gun. This is a two person job in order to get the canvas wrapped really securely. Use staples liberally- the more the better. Trim any excess fabric as needed. Be careful to not to make corners too bulky. Take your time and fold tight and clean corners.
*SEE BELOW GALLERY FOR VISUAL OF STEPS 8-10*
PART 2– CREATE YOUR ART
Tools Needed:
- Large 4 inch paint brush
- Medium 2-3 inch paint brush
- Small 1 inch paint brush
- Weenie roller/handle
- Small roller tray
- 4 inch putty knife
- Paper towels
- Large Bowl
Supplies Needed:
- Primer
- 90 minute, light weight, drywall mud
- Tricorn Black paint in matte or flat finish
- Accessible Beige paint any finish is fine
- Water
Step 1: Prime your canvas. We did two coats of this. You could also use Gesso to prep canvas. This process, priming canvas or Gesso *not both* will make sure the canvas firm and strong enough to handle the mixed materials you will soon add.
Step 2: Let primer dry throughly
Step 3: Mix your drywall mud *follow instructions on the bag* Or buy the pre-mixed option, either works.
Step 4: Use putty knife and apply your drywall mud on the canvas. There in no specific pattern. I used a combination of vertical swipes and horizontal. Some curve stroke and some harsh lines using the edge of blade. I made the mud thicker in some spots and much thinner in others. Have fun with this, there is no wrong way. *however make sure of two things. 1- do not to apply too much pressure and break through canvas. 2- do not apply mud too thick in any one spot, it won’t dry.
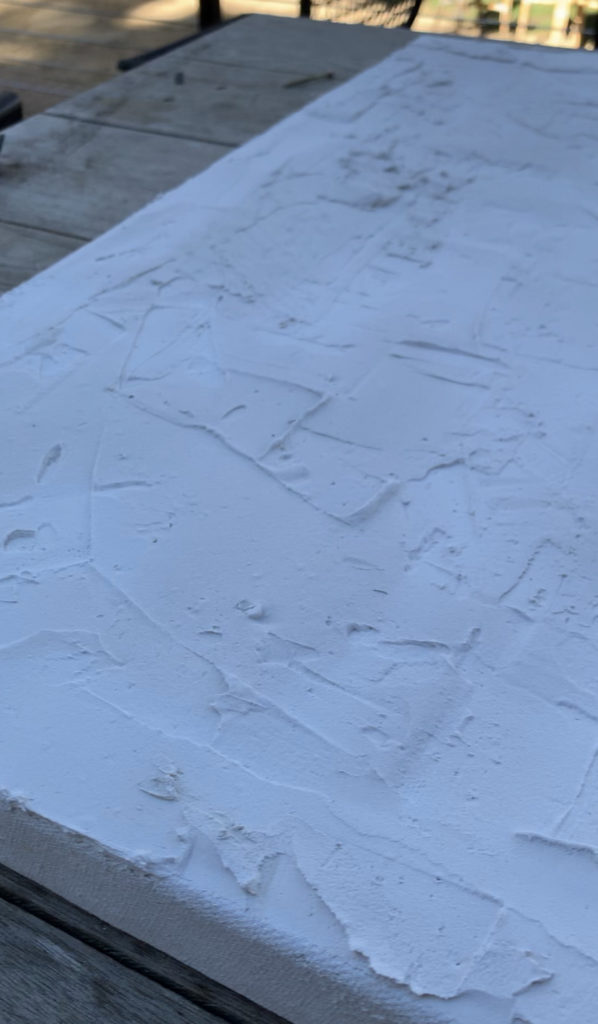
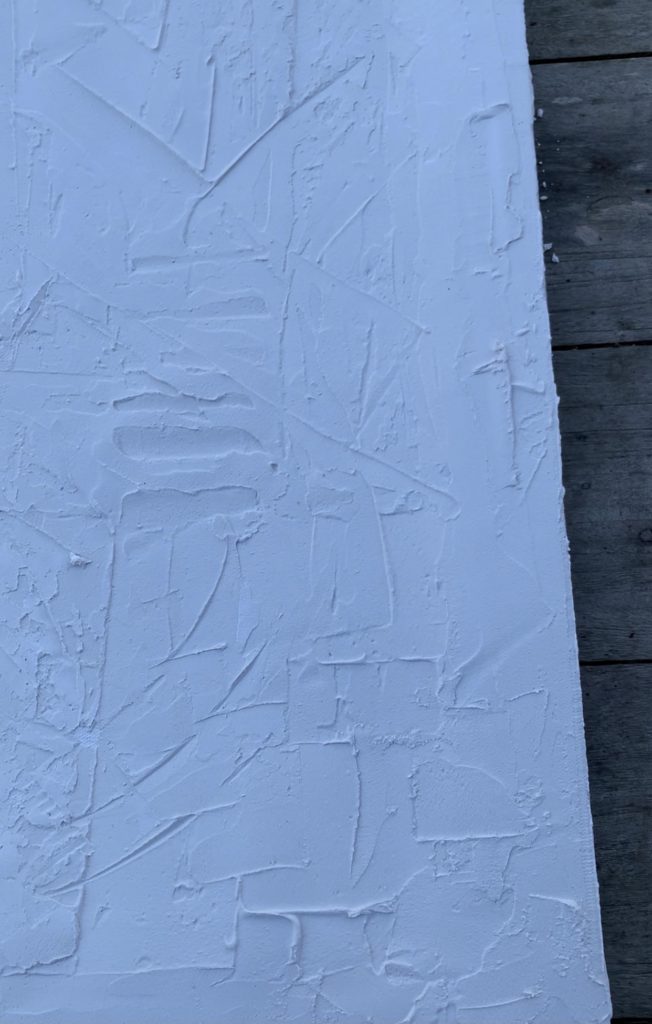
Step 5: Let drywall mud set up overnight
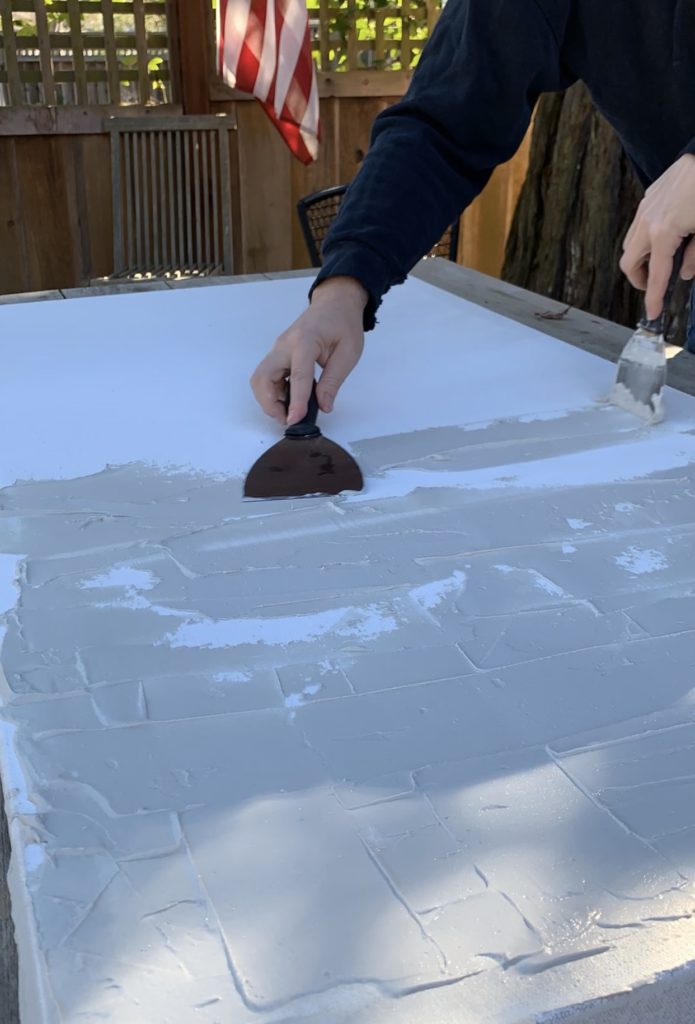
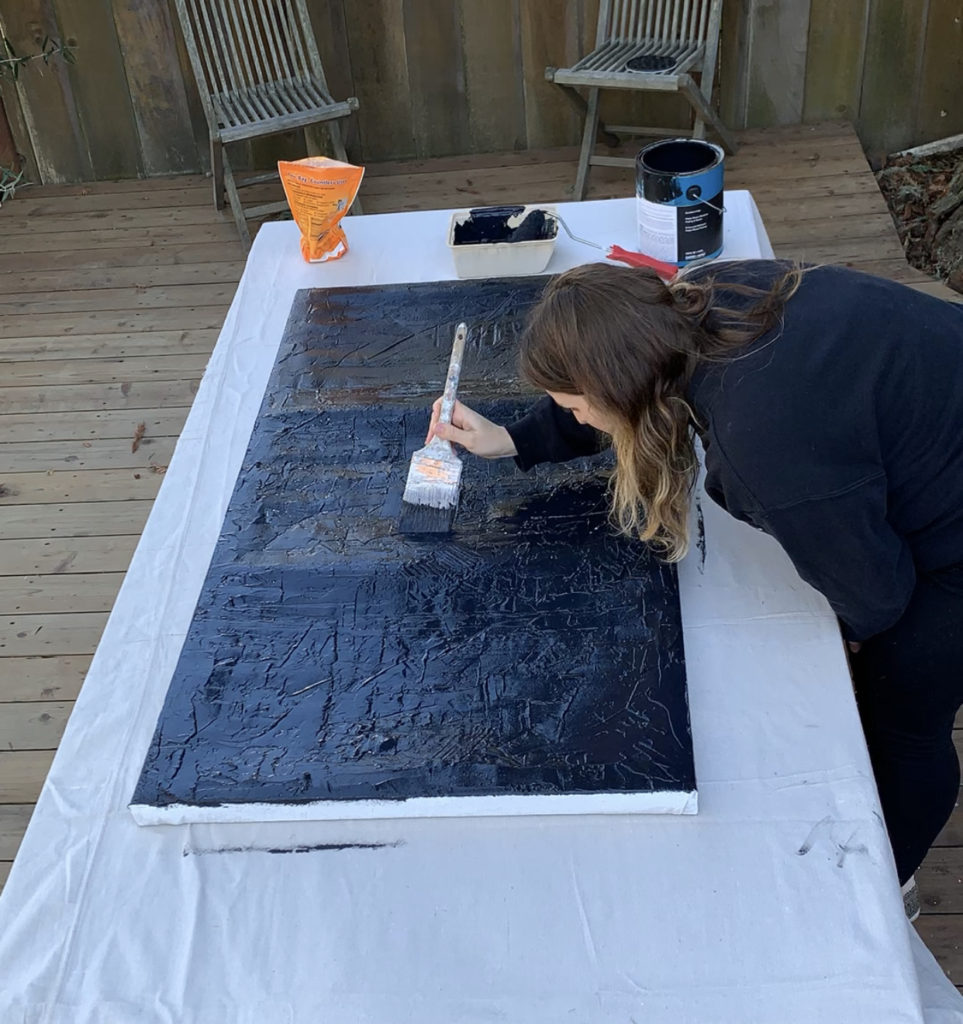
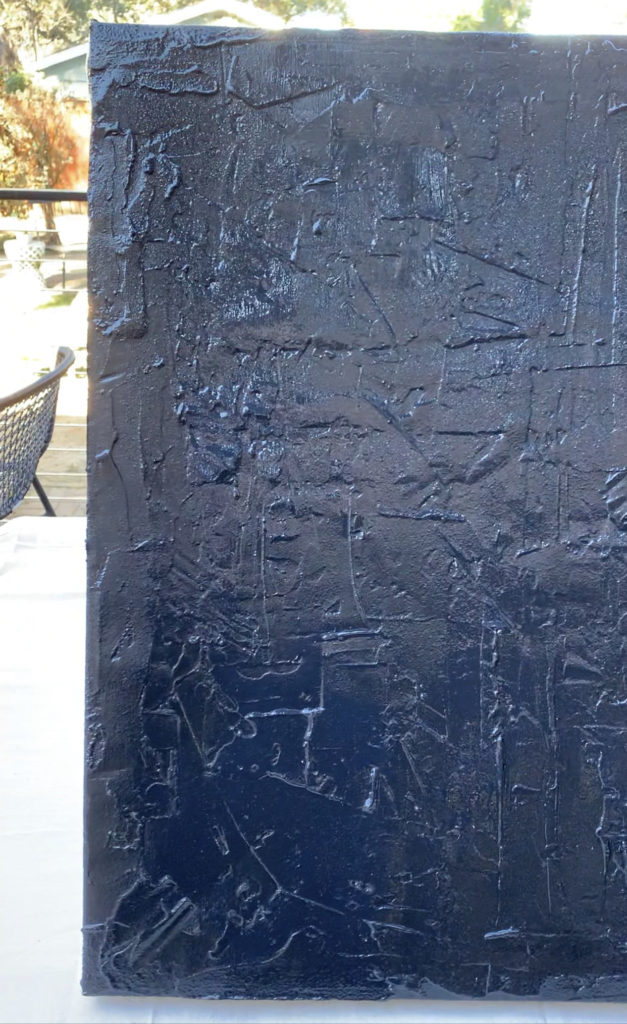
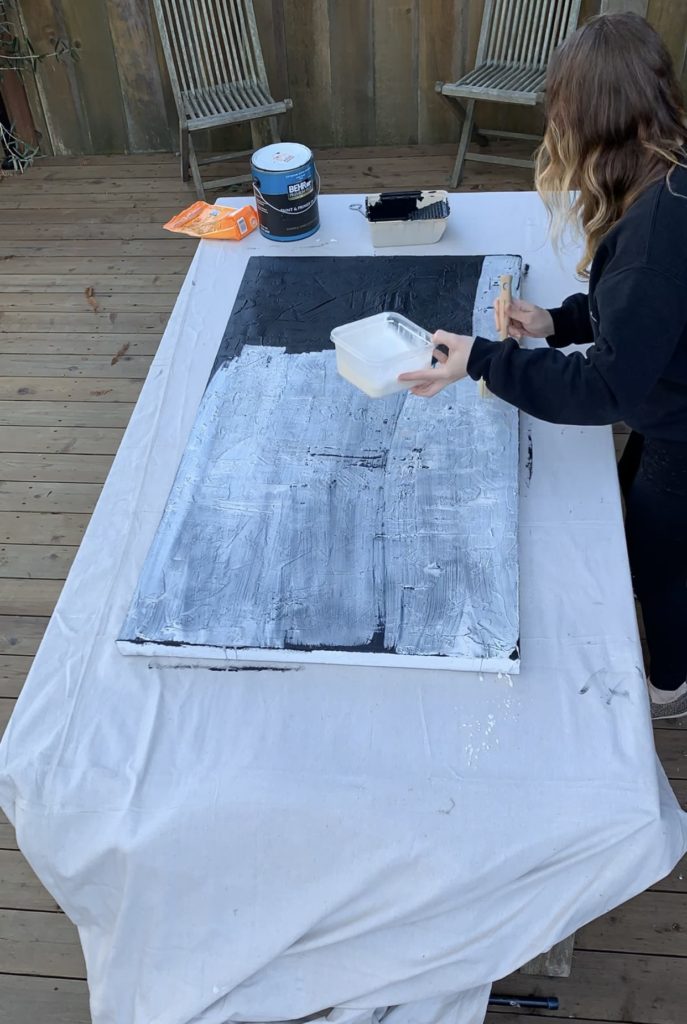
Step 6: Add matte black paint to painters tray and use paint roller to apply the matte black paint to the entire canvas (including sides). You will also need to use a your medium 2-3 inch paint brush to fully cover the piece. The drywall mud will have created grooves and texture. The brush will get your paint into these grooves.
Step 7: Let paint dry for a couple hours
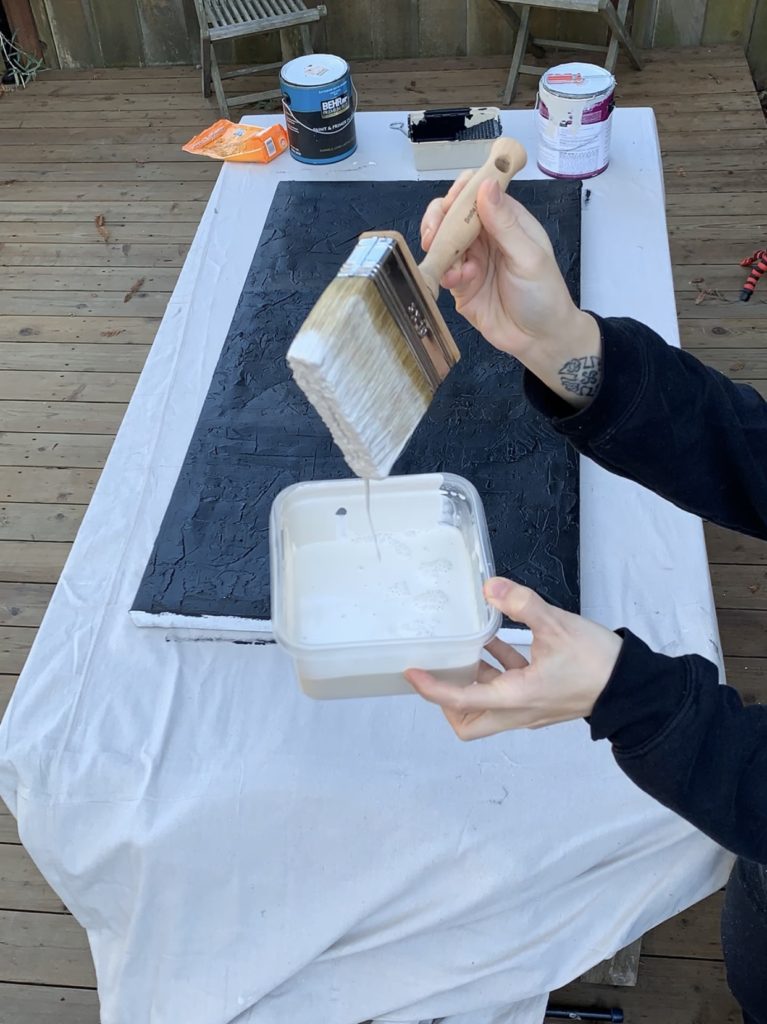
Step 8: Combine water and accessible beige paint in separate container. This mixture should have the consistency of water color. VERY watered down.
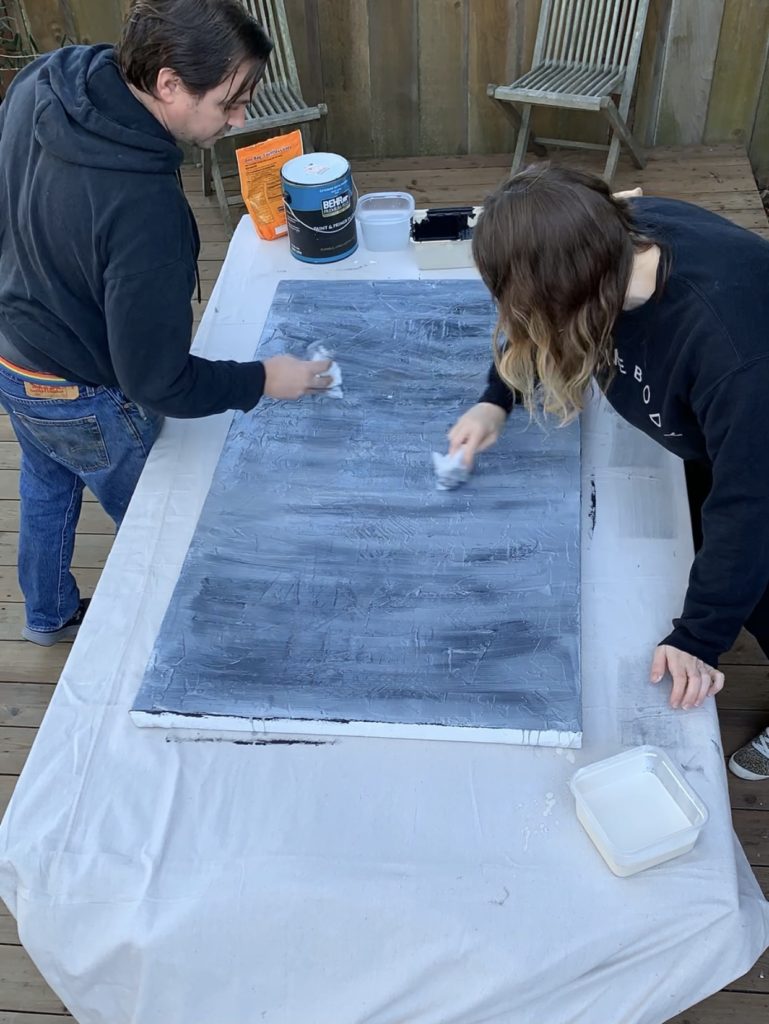
Step 9: Use your 4 inch paint brush to apply a layer of the “water color” accessible beige paint over the entire surface of painting. Brush on horizontally, brush off vertically. Repeat these steps over and over to achieve desired effect. Use a damp paper towel and dab off portions of paint to create the “smudged chalk” effect. It helps to have assistance with this part so one person can be brushing and the other dabbing.
*NOTE* Just like with the drywall mud there is not a specific pattern here. you need to play with the paint. The process of brushing “water color” on and off, as well as dabbing with damp paper towels, took about 15 minutes of playing to get the desired look.
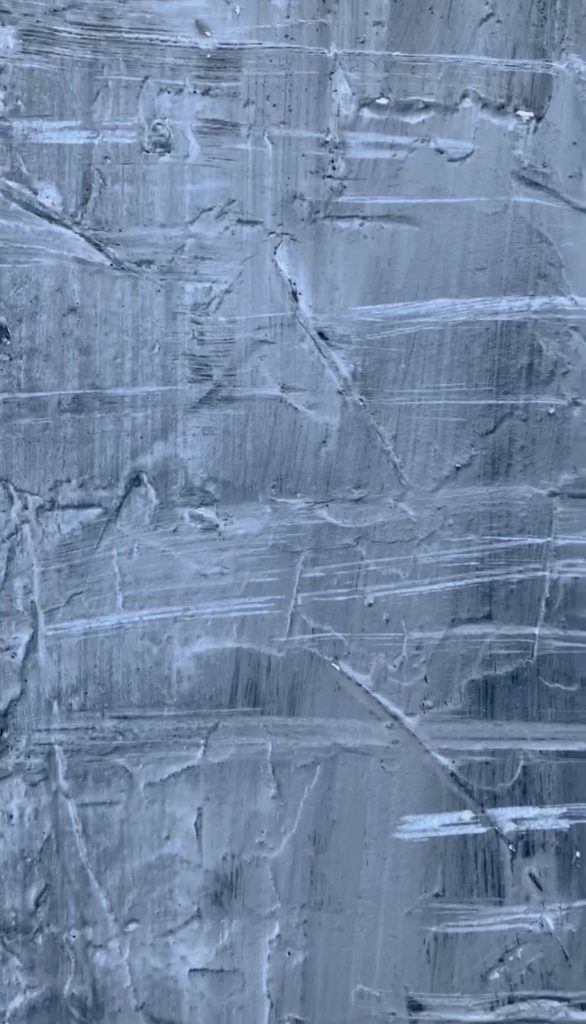
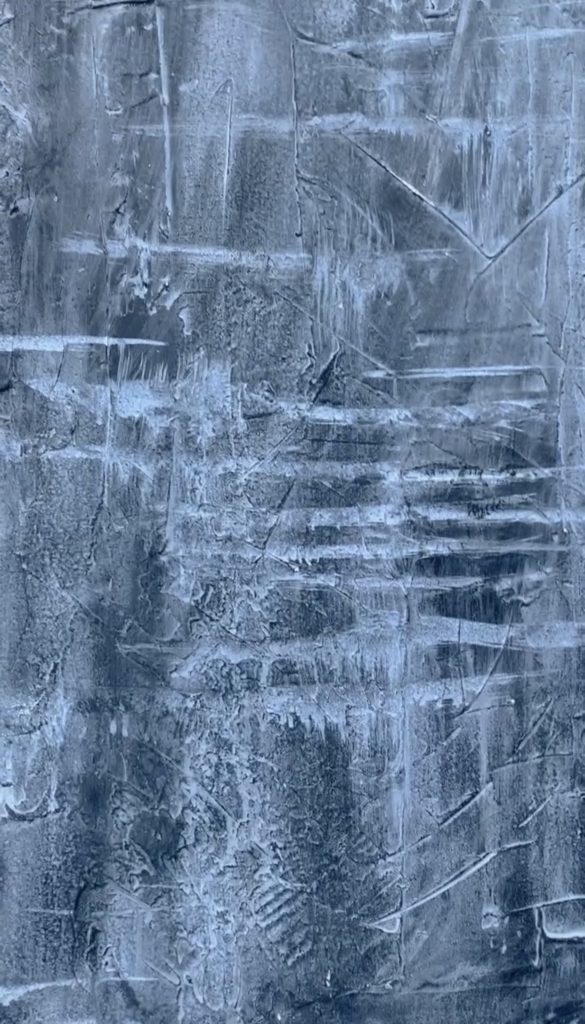
Step 10: Take your small paint brush and use the same water color mixture to add strokes to the canvas. I made clusters of horizontal lines. Focused most of my effort on the sides, top and bottom and very few in the center. When adding these strokes apply very little pressure with the brush on canvas to keep the strokes light in color.
Step 11: Once all the strokes were in place I tilted the canvas up slightly to make some of the paint from fresh strokes run down the canvas. Then I laid the canvas flat again and used my damp paper towels to smudge those runs out- which added to the “smudged chalk” effect.
*NOTE* just like with the drywall and paint there is no specific pattern. you will need to play with the paint. I created a few strokes I didn’t like, so I used a watered down blend of black paint and the water color beige paint to dab them out. It’s art, it’s not perfect, and this piece is supposed to be organic and untamed. Have fun!!

PART 3– THE FRAME
Tools Needed:
- Miter Saw
- Finish nail gun *small screws or hammer & finish nails work too*
- Nial punch
Supplies Needed:
- Black Varathane Stain
- 1x2x8 pine lumber
- Finish nails
- Wood glue
- 180-220 grit sand paper
Step 1: Make your cuts for the vertical and horizontal lengths of frame. We cut two: 53 & 3/4 inch horizontal lengths and two: 29 & 1/8 inch vertical lengths
*we did miter cut corners, please do not attempt those if you’re not skilled with miter cuts. Instead do a standard butt corner. Those are the same corner joints used to build the canvas frame*
Step 2: Sand the boards. Light sanding just to they ensure don’t appear rough or splintered.
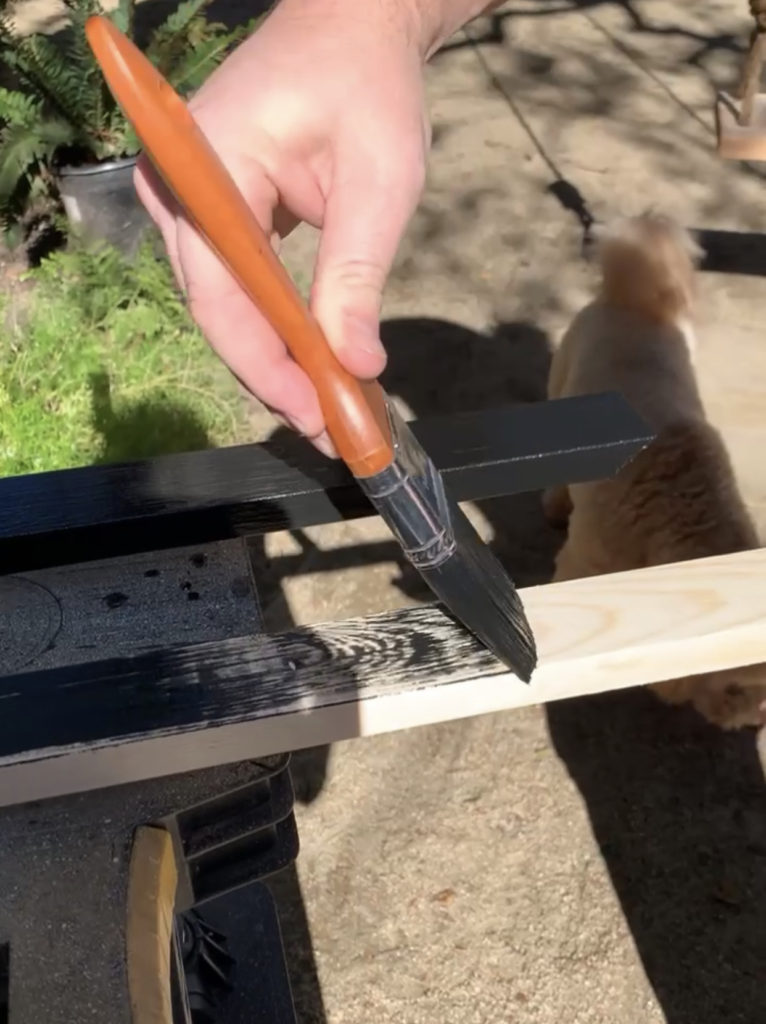
Step 3: Stain all side of your horizontal and vertical boards with your black Varathane.
Step 4: Let stain dry
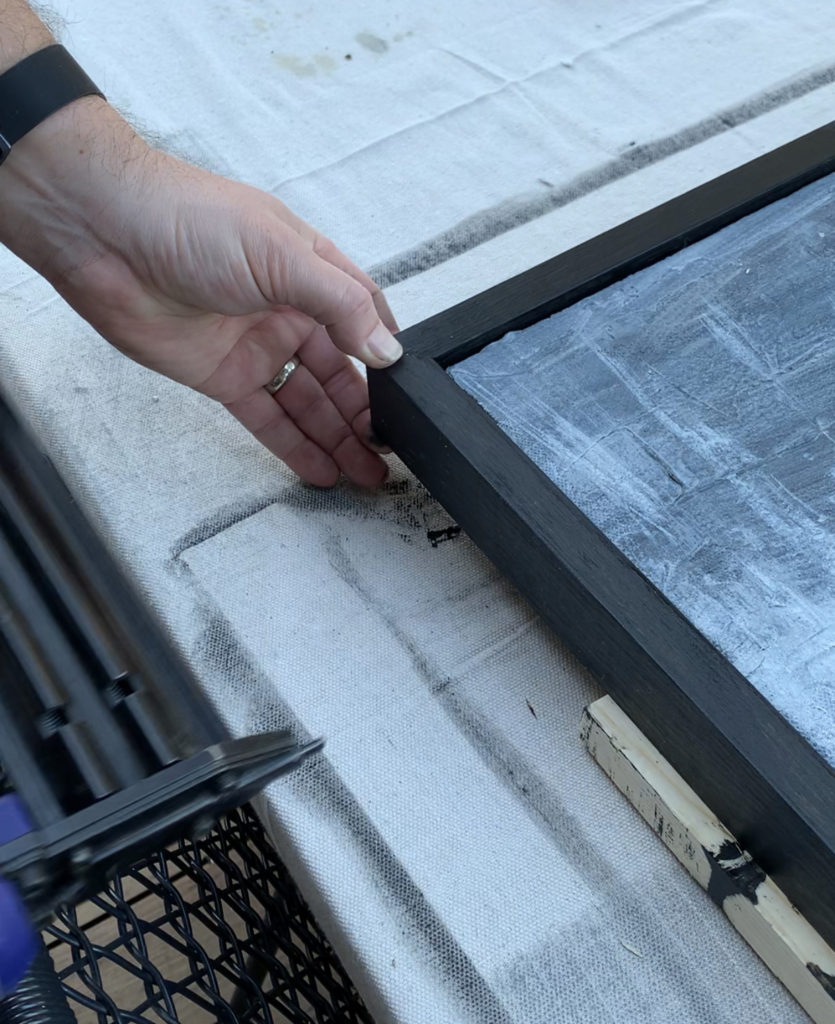
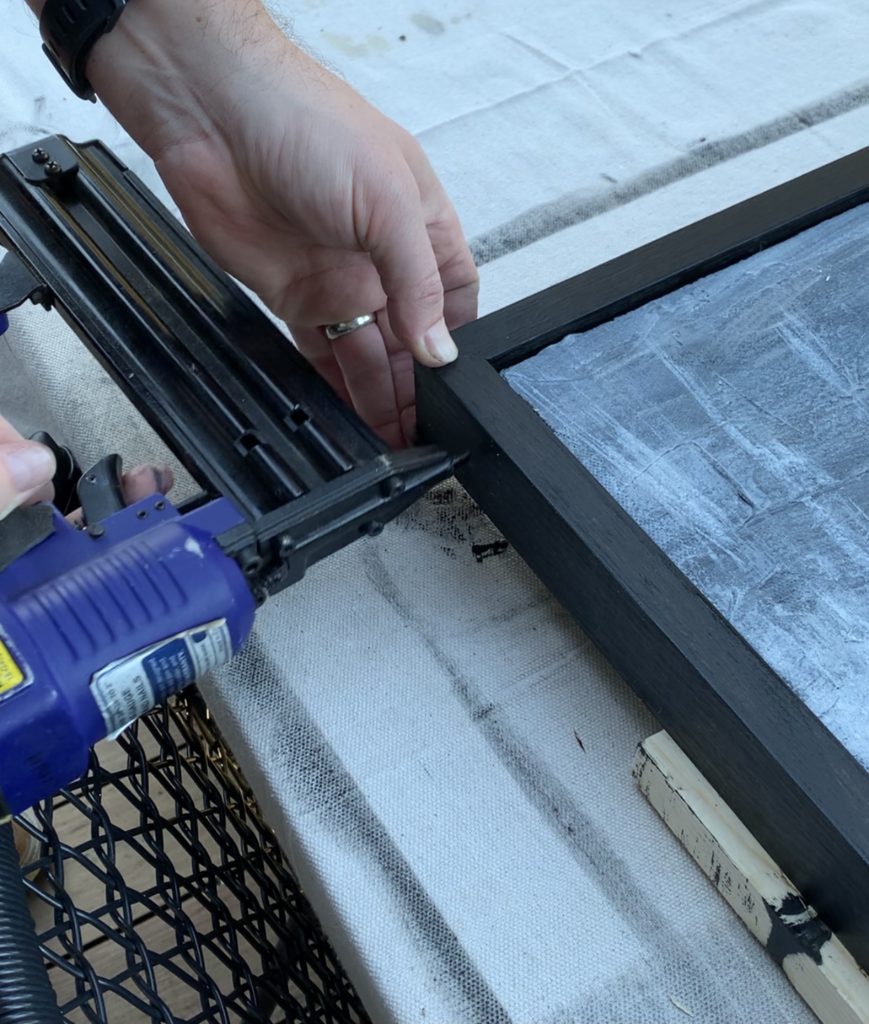
Step 5: Take your boards to the canvas. Line up a corner using one vertical and one horizontal board against the canvas. Glue the corner joint and nail the boards to the canvas starting in this glued corner. Repeat these steps on all 4 corners.
Step 6: Add nails about every 6 inches around the perimeter of the frame
Step 7: Set nails using a nail punch
*we did not do the following two steps but you can if your nail holes are obvious and bother you*
Step 8: Hide nails with wood putty.
Step 9: Cover wood putty with black Varathane stain once dry
YOU’RE DONE
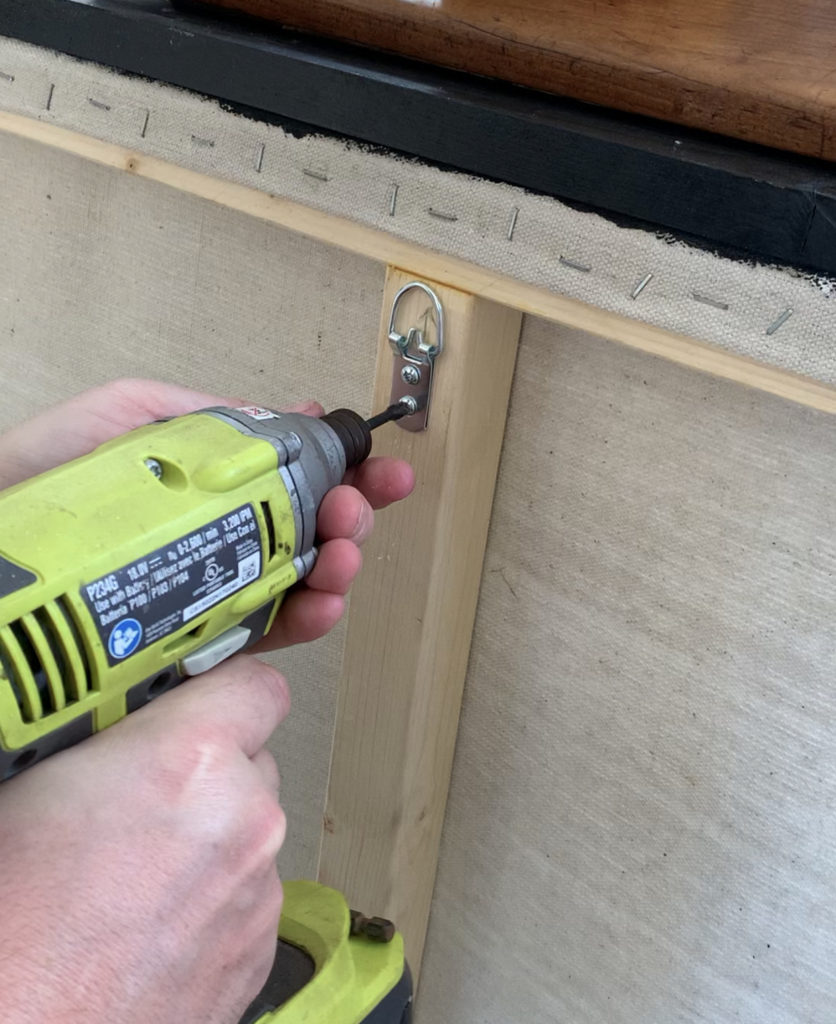
We hung our art by adding mounting hardware to the back of our canvas. We attached the mounting hardware to the interior support bars of the canvas NOT the decorative exterior frame. We used D-Ring hangers rated to 50 pounds *which is more than enough support.
Let us know if you try this project- or tag us, on Instagram and/or TikTok we would love to see your finished pieces.
Happy DIY-ing.
