


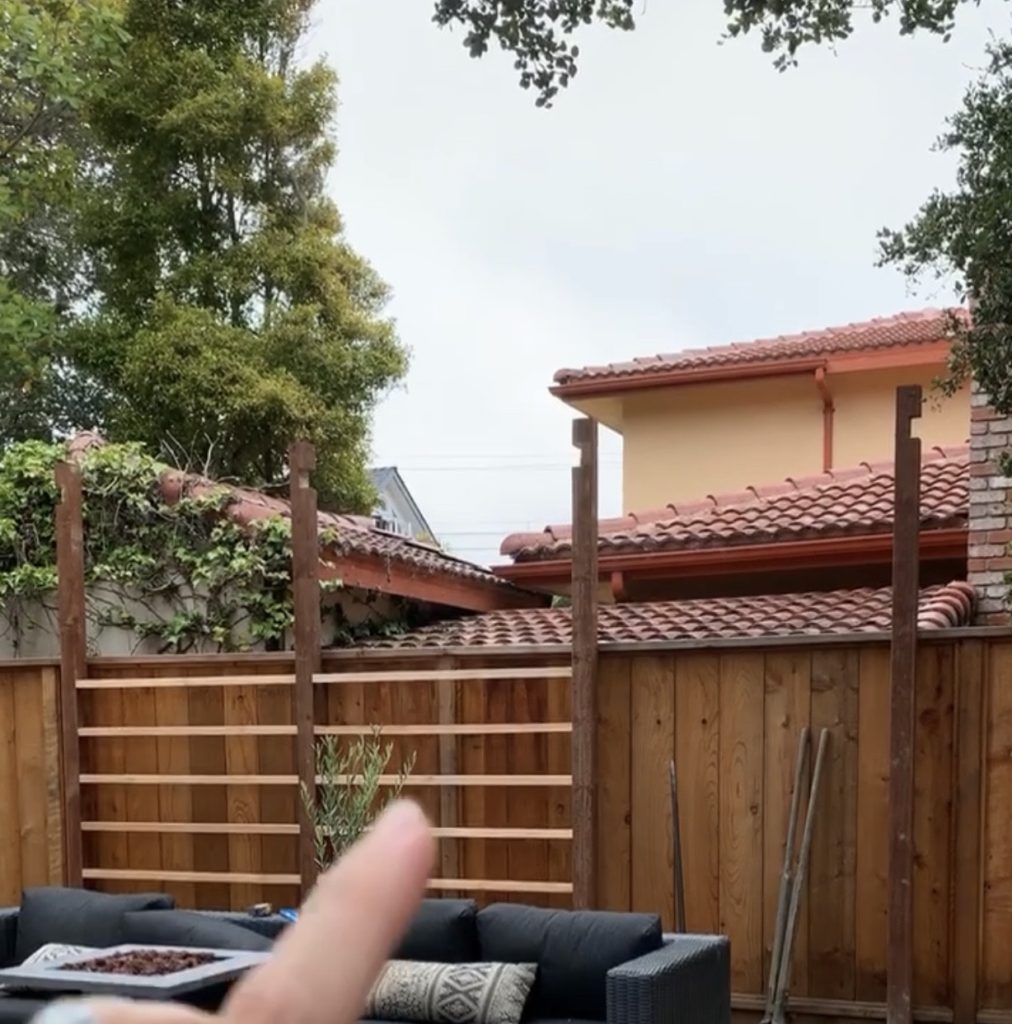
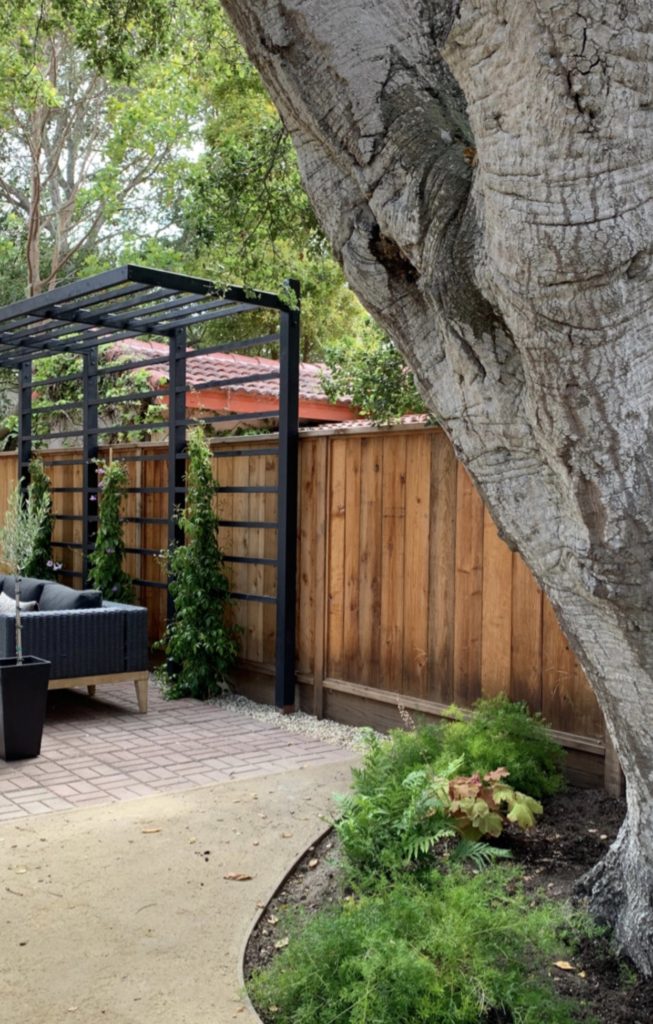
Alright alright alright… we built ourselves a cantilevered pergola! We wanted to hide the overpowering view of our neighbors mediterranean home and needed some height. We knew didn’t want to overwhelm our patio with a traditional 4 post pergola, a traditional pergola would have obstructed the view of our yard from our family room windows; we had to get creative. One night it hit me and I said to my husband… “Babe, can you make an upside down L pergola”? He looked at me and said: “A what”?! LOL so I drew what was in my head and he said: “Oooooh you mean cantilevered…. yeah, I can do that”. The next weekend he was off to the races and the end result is a stunner.


The overwhelming response when we shared the finished product on the gram was- “I want one too”! So here is a tutorial on how you can recreate this bad boy for yourself. *we are providing the exact supplies and steps we used to create the pergola needed for our space and scale needs, adjust accordingly for your space*
SUPPLIES LIST
- Four: 4×4 pressure treated 12 foot posts
- Eight: 50 pound bags of fence post concrete
- Five: 2x4x8 foot kiln dried boards
- Four: 8 inch Simpson bracket L strap
- Forty Eight- 8 foot 2×2 pine boards
- Eight: 4 & 1/4 inch by 1/2 inch bolts with washers & nuts
- Four: 2 & 1/4 inch by 1/2 inch bolts with washers and nuts
- Level
- Post hole digger
- Shovel
- Skill saw
- Drill
- Wrenches (for the bolts/nuts)
- Air nailer & nails
- Paint brushes & roller
- Paint of your choice (we used Tricorn black by Sherwin Williams)
STEPS
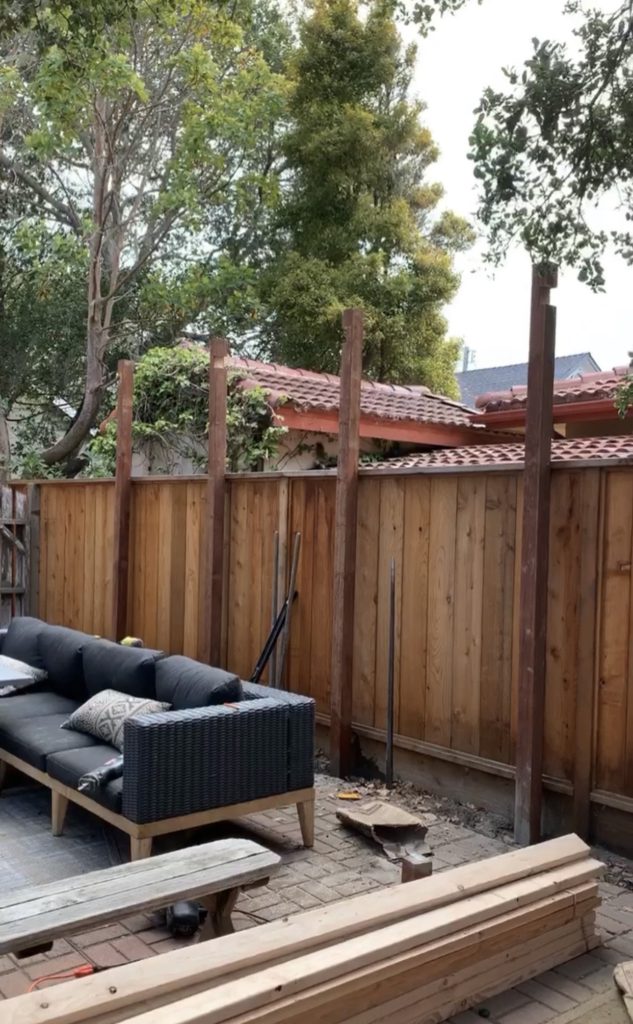
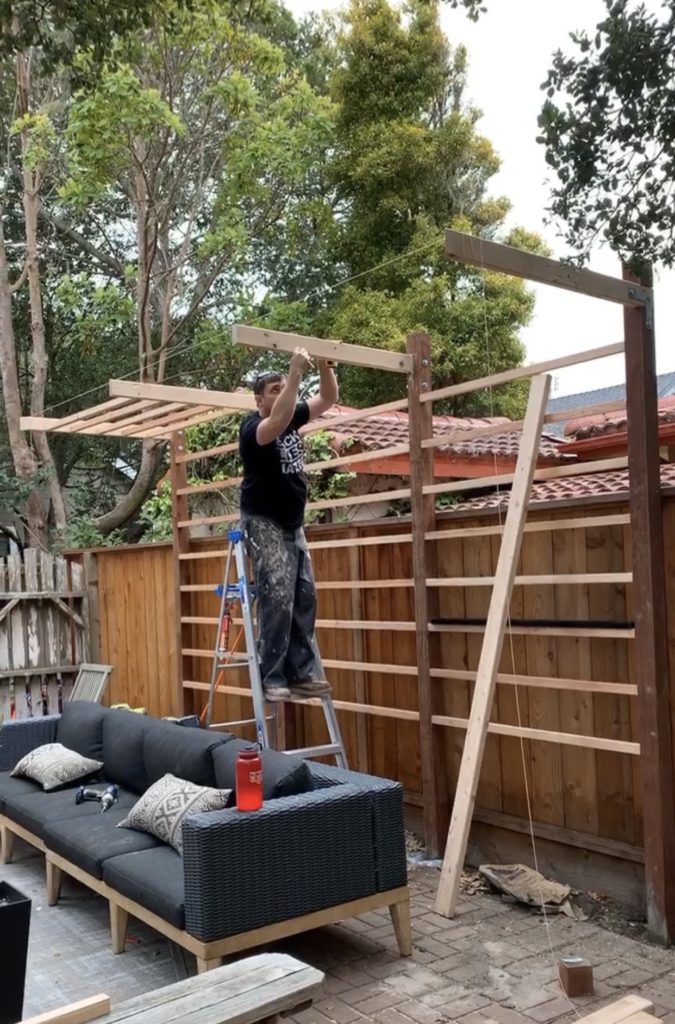
- Use post hole digger and shovel to dig four- 3 foot deep holes, one for each post. (we spaced our posts 4 feet apart)
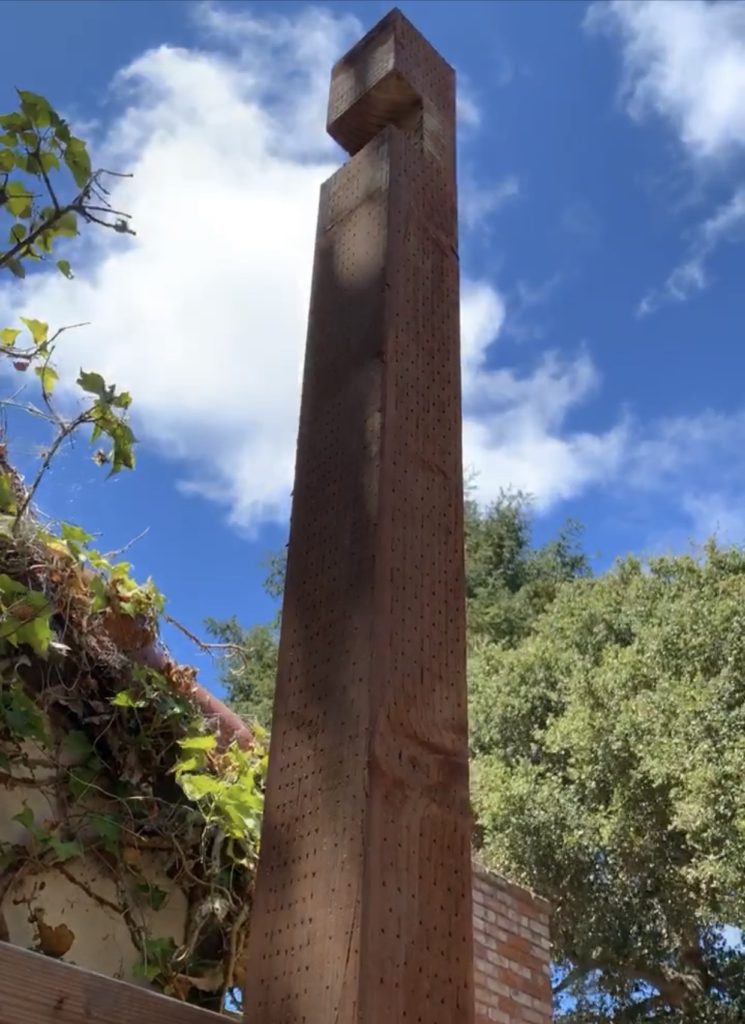
- Cut post down to desired height (in our case we cut 6 inches off length)
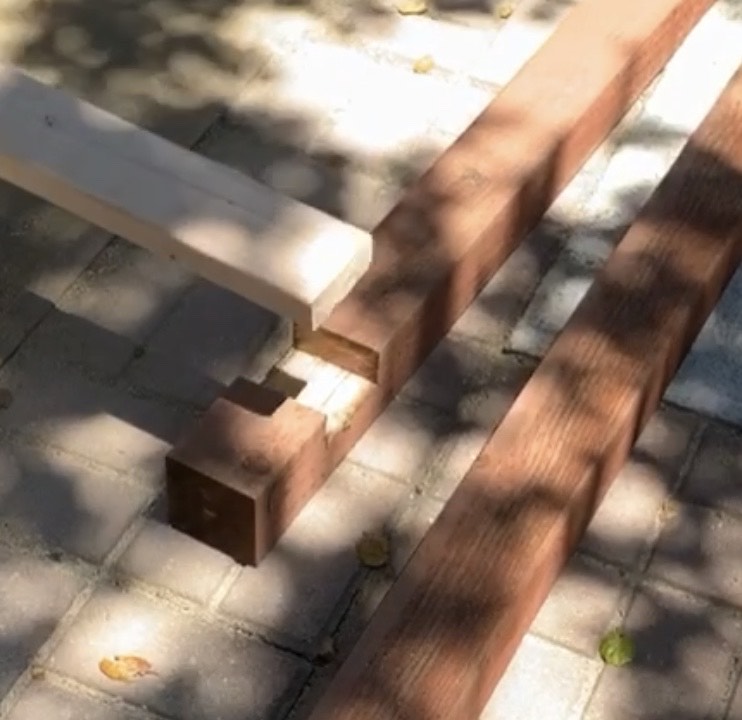
- Mark your posts, 6 inches from the top. where your notch will ultimately go. The notches will house the 2×4 “roof’ and should be the depth and width of your 2×4 board (use your 2×4 board as your guide, to make marks and ensure a tight fit)
- Once marks made, use skill saw (set to the depth of your 2×4) to cut those lines in. These marks are the outline of notch for 2×4
- Next make multiple cuts between your outline (10 cuts or so), they should be about 1/4 inch apart or less.
- Once finished with these cuts use a hammer to knock out the remaining wood between your outline to finish the notch. You can make this notch more clean by finishing out with a chisel. *Repeat steps 2-5 for all 4 posts*
- Make sure the 2×4 will fit snuggly into the notches created on each post before setting your posts into the ground/concrete.
- Now its time to set your posts- when doing this make sure the outer post notches are facing outward and the inner post notches are facing the outer posts facing inward.
- Pour 1 inch dry cement into the holes you dug in step 1
- Set post into the hole on dry concrete
- Start adding dry concrete about 6 inches at a time, packing each round with the handle of your shovel
- As you’re doing step 10 you need to be constantly aware of your post remaining level and plumb
- After the hole is halfway filled with concrete you will add visual 3-4 inches of water to the hole
- Continue pouring dry concrete, packing with shovel until you get 3 inches from top of the hole, then fill with water.
- Posts will need to set for 24 hours (during this time Matt likes to mix a small amount of concrete and adds it to base of post at a slight incline around al 4 sides to help divert rain water away from posts)
- Cut two of your 2×4’s in half creating four- 4 foot length boards these will be used to create pergola “roof”
- Take these four 4 foot lengths (one at a time) and set each one into its notch using 1 screw to hold it in place for now
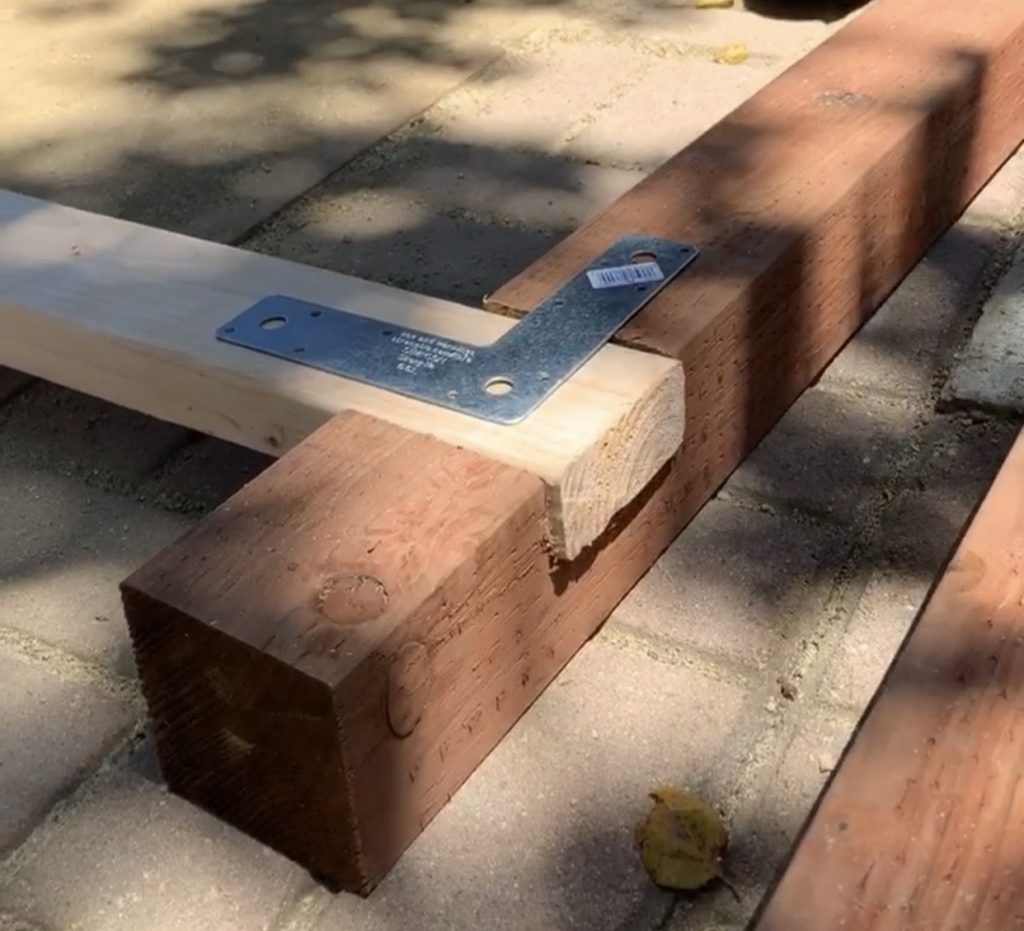
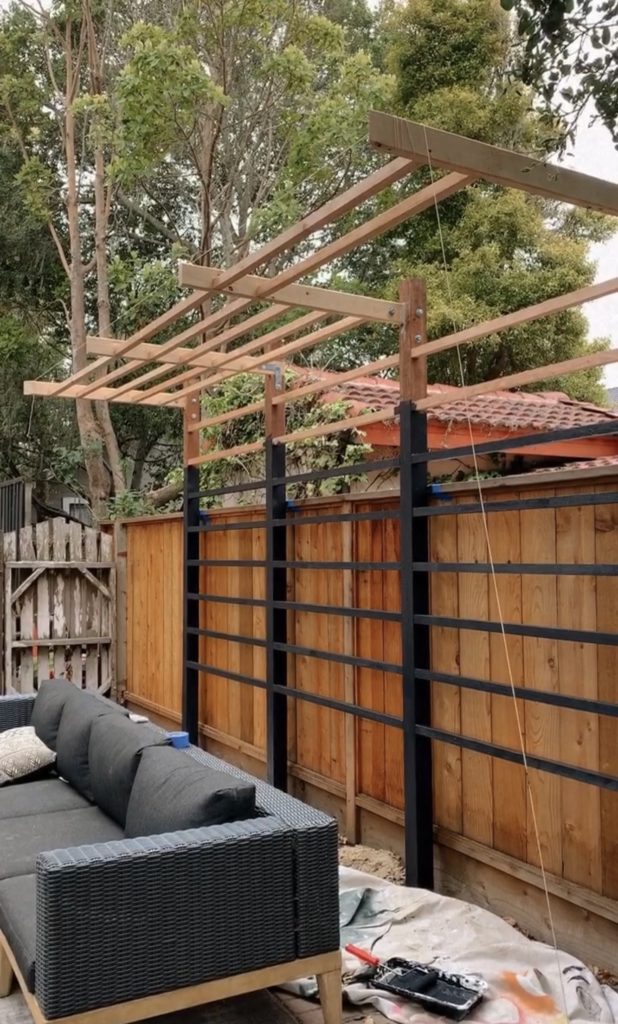
- Locate your 8 inch Simpson L straps
- Hold 1- L strap in place where your 2×4 and post meet in the notch. Center L strap on the post and 2×4- and trace holes where the bolts will ultimately go
- Drill out the holes and use 2- long bolts and 1 short bolt per L strap (you may need a hammer to help tap them through)
- Now the main structure is built and we can cut and set the 2×2 pine boards between posts. We spaced ours pergola slats 8 inches apart
- Cut 2×2 pine boards to fit between your posts for walls
- Cut 2×2 boards to fit in between the 2x4s for ceiling
- Nail 2×2 pine boards into place with air-nailer and finish nails
- Finally close out the front of “roof” by nailing remaining 2x4s onto fronts of the 2x4s that are already in place
- Clean & dust well
- Paint with 2 coats of exterior paint color of your choice *we used Tricorn black by Sherwin Williams
Check out this photo gallery for some helpful shots!

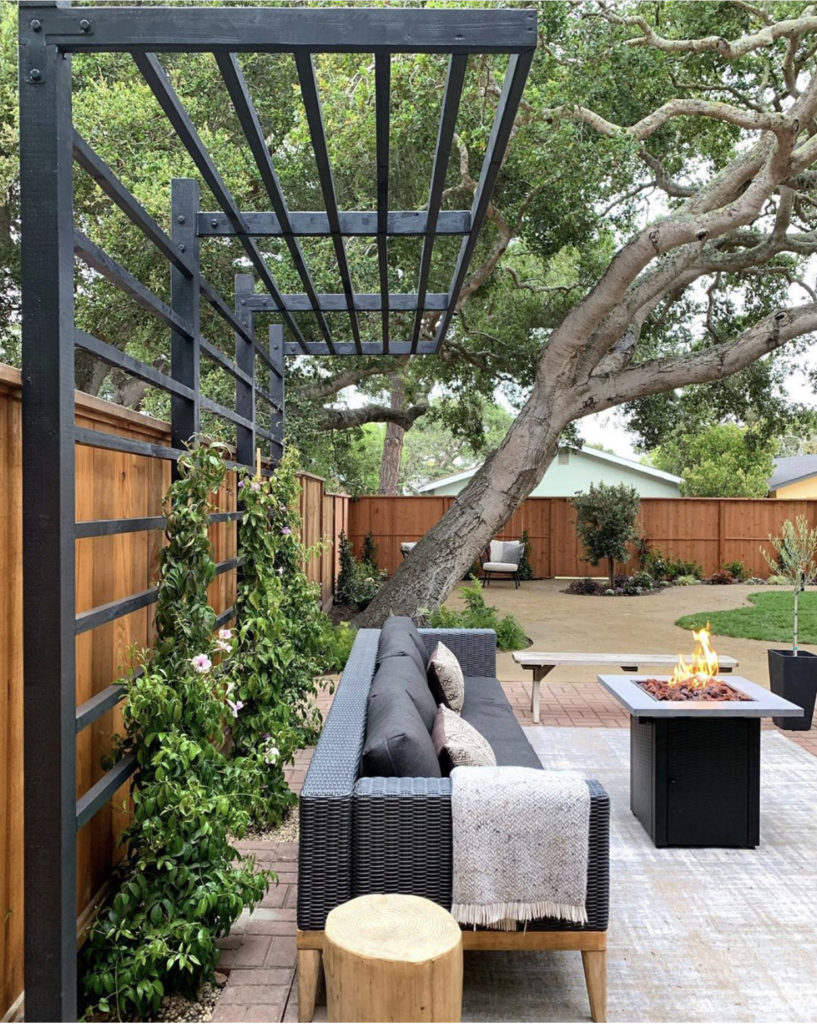
Hope we see lots of gorgeous cantilevered pergolas poppin’ up out in your yards. Make sure to tag us if you recreate one for yourself. Happy building.
NOTE: In regards to dry pouring concrete: please be aware that concrete needs water in order to work, dry pouring relies on the water content of the surrounding soil to provide this, if you live in a dry climate it is advisable to thoroughly wet the area around the posts, before leaving to set for 24 hours. Or else build a support structure to hold your posts in place and pour wet concrete.
